3M provides guidance on ash residue vehicle cleanup
By onCollision Repair
Amid fires in the Carolinas and following extensive damage in Southern California, 3M has shared guidance with Repairer Driven News on properly removing ash residue from vehicle surfaces.
A technical bulletin from 3M is forthcoming.
Paige Wogahn, Automotive Aftermarket Division application engineer, said ash in a dry form doesn’t pose a major threat to paint condition as long as the grit isn’t being wiped or moved around causing scratches.
“When the ash reacts with water, the calcium and potassium in the ash form a caustic solution,” she said. “Caustic solutions can be harmful to people and surfaces by eating through/damaging a surface chemically. The strength of these solutions is increased by both time and heat. This is very similar to how bird poop or other natural contaminants behave on a clearcoat. Because of this, I would recommend wearing a mask, nitrile gloves, and safety glasses when cleaning/detailing cars with large amounts of ash.”
First, it’s best to go by the following steps in a timely manner, and never leave the car to sit while wet. Doing so will continue and intensify the caustic reaction, Wogahn said.
-
- Hose the vehicle down to remove the bulk of the ash before continuing. During this stage, don’t use a rag, mitt, hand, et cetera to wipe down the vehicle. This could cause additional scratching from the grit of the ash.
- Wash the vehicle with a pH-neutral car soap. This will help to counteract the basic nature of the caustic reaction. The best application method would be to apply with a hose, bucket, et cetera rather than a rag or a mitt to prevent scratching. Rinse the vehicle clean once again after washing with car soap. Wogahn recommends Meguiar’s Shampoo Plus.
“At this stage, I would expect the car to be mostly free of residue,” Wogahn said. “If it is not, either repeat the above steps or begin removing excess residue with cleaner clay if necessary. Cleaner Clay may or may not be necessary depending on the severity of the debris. Lightly and smoothly run your hand over a ‘visibly clean’ area of the vehicle. If you can feel texture/dirt on the clearcoat rather than a smooth surface, a clay cleaner may be necessary.”
Wogahn identified 3M’s Perfect-It Cleaner Clay as an example product.
Once the car is free of all visible residue, dry the vehicle with microfiber towels, and inspect all jambs and crevices for any missed ash residue.
Assess the paint finish for caustic etching or damage to the paint surface, such as the example below caused by bird poop.
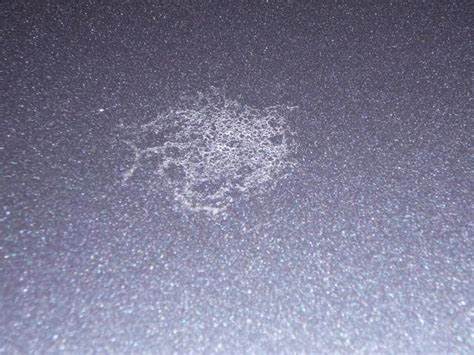
“If no defects are found, further correction may not be necessary,” Wogahn said. “If defects are contained within the clearcoat, they should be correctable with a paint finishing solution. I would recommend starting with a fine stage (for example, polish) and working backward to more aggressive stages until one is found that can remove the defect. Waxes and other finish products may cover/hide these marks but is not a permanent fix.”
-
- Start with 3M’s Machine Polish and black foam. If scratches can’t be removed, try 3M’s EX AC Rubbing Compound with a white foam pad. If necessary, use T3000 to refine scratches. Keep in mind that any coarser material will change the final panel texture.
- Once a product has been found that removes the scratches/defects, work back through the system SOP starting at the coarsest product necessary to produce a high-quality finish.
Next, with the 3M Random Orbital Polishing System, try the polish and compound then Trizact 3000 to remove defects. Lastly, work through the system SOP starting from the coarsest step necessary through to the final polish.
Pacific BMW Shop Manager Andrew Batenhorst also shared with RDN an ash residue cleanup procedure his shop uses in Southern California on vehicle interiors:
-
- Remove customer belongings from the vehicle including child seats and floor mats.
- Remove seats.
- Remove sill trims that overlap onto vehicle carpet. Body opening weatherstrips may also need to be removed.
- Remove cabin air filter(s).
- While wearing proper PPE, utilize a blow gun or Tornador type tool to blow out all air conditioning ducts and defroster ducts to extract ash/debris.
- Vacuum up the debris.
- Deep clean all plastic and leather surfaces with a neutral pH product. Depending on the stain, the pH strength may need to be adjusted. A steam cleaner may also be beneficial to help kill bacteria.
- The headliner may or may not need to be cleaned/de-odorized if a soiling or smoke smell is present. Headliner material is easily damaged. Use the appropriate tools and techniques to avoid oversaturation and possible delamination of the material from the fiberboard.
- Shampoo all carpeting and upholstery. Monitor the cleanliness of the water coming into the waste bucket of the extractor/carpet machine. Repeat this step as necessary.
- Once cleaned, set up fans and/or portable heaters to assist with drying.
- Reinstall the removed seats and trim pieces once the carpet is dry.
- Apply a plastic or leather conditioner to the appropriate surfaces.
- Once the interior is dry, assess the odor of the vehicle. If the smoke smell persists, use an ozone machine to purify the air and extract the odor. This may take two applications.
Assistance from the Collision Industry Foundation (CIF) is also available to collision repair professionals who experience significant loss due to natural disasters, such as the fires in California and the Carolinas.
Those in need can apply here. Donations can also be given here.
Images
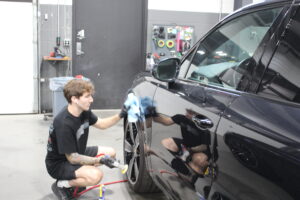
Featured image: Stock photo from K&M Collision in Hickory, North Carolina (Lurah Lowery/Repairer Driven News)