On Target provides peak at Bronco Raptor front bumper component replacement, new I-CAR tech guide
By onCollision Repair | Repair Operations
In its first Bronco Raptor part repair and replacement guide, Ford’s summer edition of “On Target” covers removal and installation of the front bumper upper cover.
On Target is a quarterly newsletter provided by Ford on various collision repair procedures and updates. More in-depth information on Ford and Lincoln repairs can be found in the Ford Workshop Manual.
While similar to Bronco collision repair, highlights of which are found in all four 2021 On Target editions and in 2022’s Volume 2, there are some differences between the two models.
For example, 2021 Vol. 3 provided a look at the Bronco structure, which includes:
-
- A fender apron brace (upper and lower) constructed of high-strength low-alloy (HSLA) 340 steel;
- A body structure constructed of boron, dual phase (DP) and high-strength steels;
- Roof panel reinforcements constructed of high-strength low-alloy (HSLA) and bake-hardened (BH) steel;
- Bolted, removable front fenders, hinged doors, and hood; and
- Body-side outer panels constructed of aluminum and bake-hardened steel
It’s also noted that bumper beams are typically made from high-strength or stronger-class steel, so they’re not repairable if kinked or torn and must be replaced. Heat should not be used in minor repairs because it will cause the bumper beam to weaken. Instead, cold straightening should be carried out.
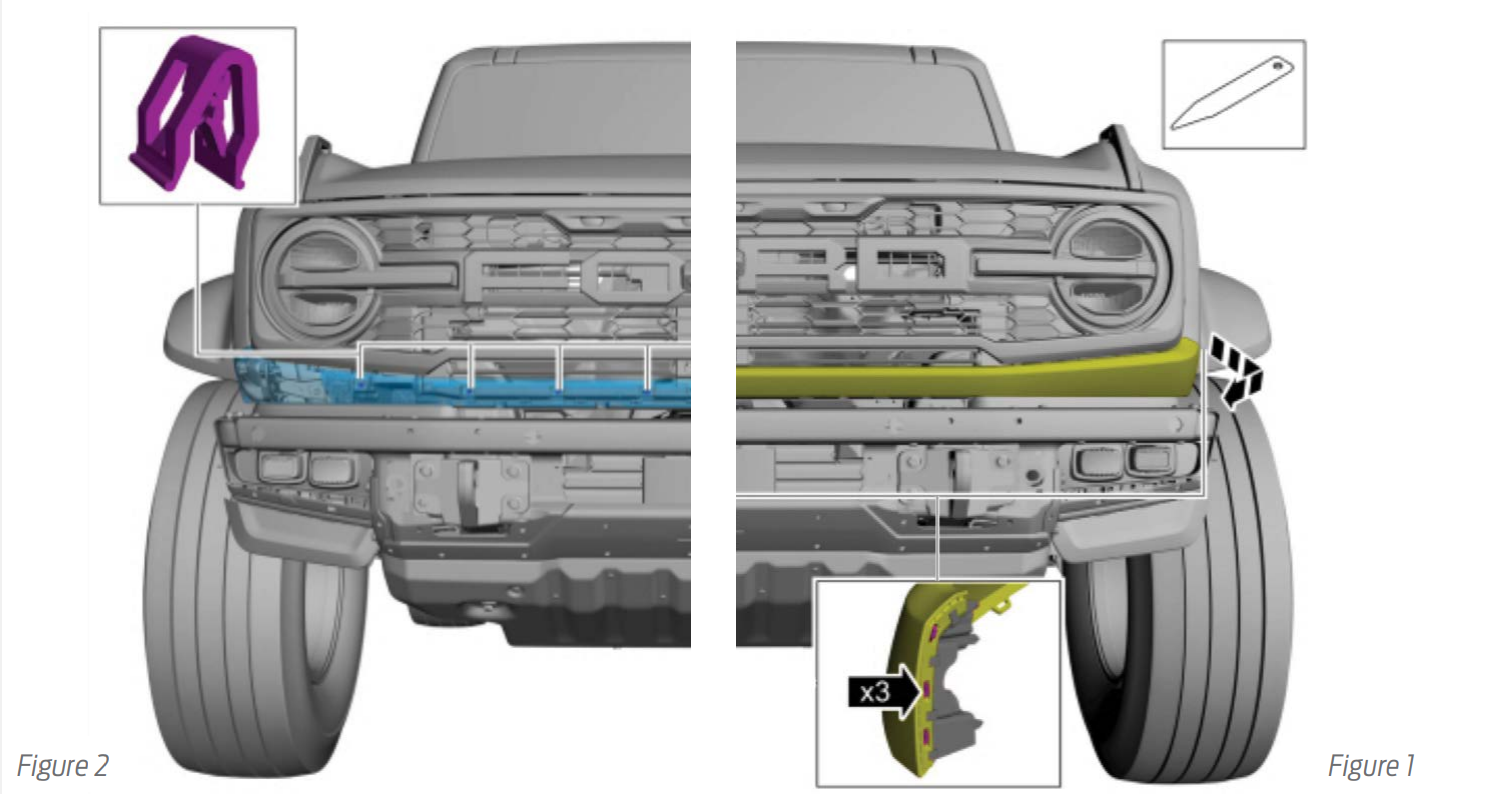
The most recent On Target also covers replacement related to bumpers but specifically for the Bronco Raptor.
To do so, an interior trim remover will be needed to release the sides of the front bumper upper cover from the side brackets. That’s after removing the screws and front license plate bracket. Then, release the clips and remove the front bumper upper cover and bracket assembly.
Inspect both side brackets for damage. If damaged, remove the screws on one or both of the side brackets then remove the tabs and the bracket(s). Installation requires 18 lb.in/2 Nm of torque.
On Target notes that any repair information specific to the Bronco Raptor is designated in the Ford Workshop Manual.
Examples of properly verifying that bolts are torqued according to OEM specifications and why doing so is an important step in repairs are provided in this video by Nylund’s Collision Center:
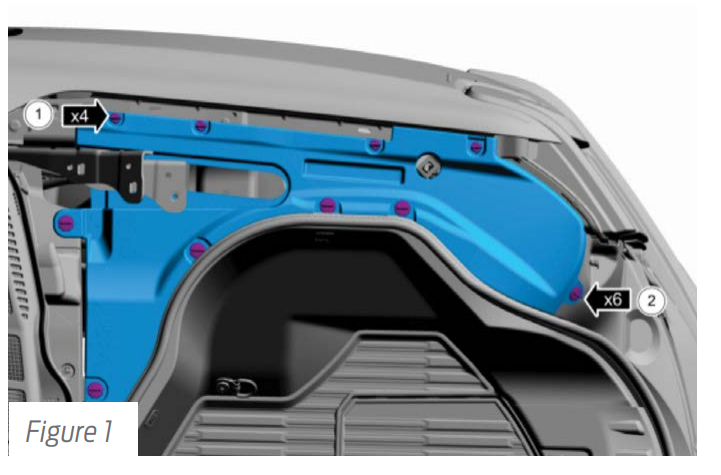
The latest On Target also gives a second glimpse of F-150 Lightning disassembly steps.
In its second installment of a series covering F-150 Lightning collision repair procedures, On Target Vol. 2 takes a look at the front, under-hood storage compartment. In the first of the series, an overall look at the Lightning’s structure was given.
In a recent episode of I-CAR’s Repairers Realm video series, technical experts Jeffrey Poole, Joel Dufkis, Bud Center, and, joining virtually, Senior Ford Damageability Engineer Gerry Bonanni, discussed important aspects of the new truck from similarities to differences.
Bonanni said the Lightning is made the same as all other F-150s from apron tubes to aluminum panels and structural parts so repairs are similar, if not identical. However, there are some differences in the bed, which is covered in On Target as well as the Repairers Realm video.
The sibling vehicles to the Lightning also have most of the same advanced driver assistance system (ADAS) sensors and radar components, which the Repairers Realm episode gives an overview of.
Differences in the Lightning’s bed are more obvious if it’s removed because the electric battery inverter, the rear-drive motor, the top of the battery enclosure, the Pro Power OnBoard unit, and the dual AC compressors become visible, On Target states.
The two separate AC systems are a feature that Dufkis noted he has not seen in other EVs. One system is dedicated solely to cooling the electric battery and motors and the other for cooling the vehicle occupants.
Another difference in all EV repairs is technicians must be trained on how to handle, work on, and store EVs and wear the right PPE.
To remove the under-hood storage compartment, take the trim pins out, disconnect the electrical connector, and remove the luggage hold down net (if included) then remove the load compartment floor storage cover, and with another technician’s help, remove the bolts to pull the under-hood storage compartment out.
On Target notes, “When researching the official Ford Workshop Manual (WSM) — a resource that should always be consulted when repairing any Ford or Lincoln vehicles as it provides step-by-step repair instructions — technicians will find the information for the Lightning inside the entry for the non-electric F-150. Any repair procedure that is unique to the Lightning will include the word ‘Electric’ after the specific section repair topic.”
The summer volume of On Target introduces I-CAR’s new Entry-Level Tech Guide, which is designed specifically for techs that are just starting out to build their knowledge and skill set, “providing them with a strong foundation to succeed within the industry.”
Basic safety procedures and industry terminology to more advanced concepts such as blueprint reading and measuring techniques are included in the guide.
For more information on Ford-specific I-CAR training, visit I-CAR.com/Ford or call 844-505-9557 to speak with a representative.
Images
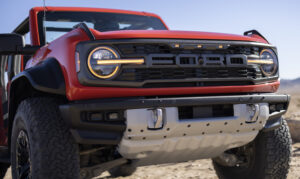
Featured image: 2022 Ford Bronco Raptor (Provided by Ford)
A diagram shows the Ford Bronco Raptor’s front bumper upper cover and bracket assembly. (Provided by On Target)
A diagram shows where the trim pins and the under-hood front cargo cover are located on the F-150 Lightning. (Provided by On Target)